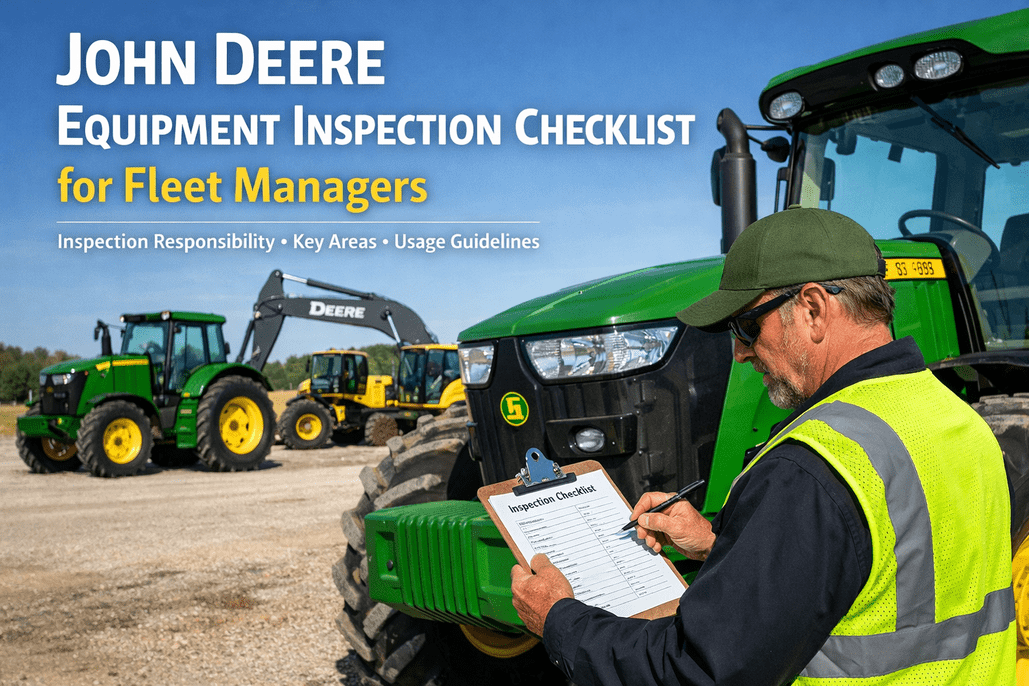
Standardized equipment inspections are the foundation of fleet safety and reliability. This John Deere inspection checklist gives fleet managers a proven framework to ensure every machine gets thorough, consistent inspections—whether you're running 5 units or 500. The result: fewer breakdowns, reduced liability, and equipment that performs when your crews need it. Start your free digital inspection trial, or book a demo to see fleet-wide inspection management in action.
Why Standardized Inspections Matter
Every piece of John Deere construction equipment represents a significant investment—and a potential liability if not properly maintained. Standardized inspections create accountability, ensure consistency across operators, and build the documentation trail that protects your business.
Catch Issues Early
78% of equipment failures show warning signs 2-6 weeks before breakdown. Daily inspections catch these signs when repairs are simple and inexpensive.
Ensure Operator Safety
Pre-operation inspections verify that safety systems—backup alarms, lights, brakes, ROPS—are functional before operators put themselves at risk.
Maintain Compliance
OSHA requires employers to inspect equipment before each shift. Documented inspections demonstrate compliance and reduce citation risk.
Protect Your Investment
Consistent inspections extend equipment life, maintain warranty coverage, and improve resale value when it's time to upgrade your fleet.
Inspection Responsibility Matrix
Clear accountability is essential for effective inspection programs. This matrix defines who is responsible for each type of inspection and when it should occur.
Key Inspection Areas by System
Every John Deere inspection should cover these critical systems. Use this as your master reference to build equipment-specific checklists for your fleet.
Engine & Powertrain
- Engine oil level and condition (dipstick check)
- Coolant level in overflow reservoir
- Air filter restriction indicator
- Fuel level and water separator
- DEF level (Tier 4 Final engines)
- Belt condition and tension
- Exhaust system and DPF indicator
- Unusual sounds, smoke, or vibration
Hydraulic System
- Hydraulic oil level (sight glass)
- All hoses for wear, cracks, or bulging
- Fittings and connections for leaks
- Cylinder rods for scoring or damage
- Control response—smooth, no jerking
- Hydraulic tank breather condition
- Oil color and clarity (milky = water)
- System pressure (if gauge equipped)
Safety Systems
- ROPS/FOPS structure integrity
- Seatbelt condition and operation
- Backup alarm audible and functioning
- All lights (head, tail, work, warning)
- Horn operation
- Mirrors and camera systems
- Emergency stop function
- Fire extinguisher presence and charge
Brakes & Steering
- Service brake pedal feel and response
- Parking brake holds on grade
- Steering response—no excessive play
- Articulation joint condition (loaders)
- Steering cylinder condition
- Brake warning lights/indicators
- Hydraulic brake fluid level
- Brake component wear (if visible)
Undercarriage & Tires
- Track tension (tracked equipment)
- Track shoe/pad wear and damage
- Sprocket, idler, and roller condition
- Tire pressure (wheeled equipment)
- Tire tread depth and wear pattern
- Cuts, bulges, or sidewall damage
- Lug nut torque verification
- Final drive oil level
Structural & Attachments
- Boom, arm, and frame for cracks
- All pins and bushings for wear
- Bucket/attachment condition
- Quick coupler operation and locks
- Cutting edges and teeth wear
- Counterweight mounting
- Guards and covers secure
- Swing bearing (excavators)
Equipment-Specific Inspection Focus
While all John Deere equipment shares common inspection points, each machine type has unique areas that require special attention.
Excavator Inspection Focus
35G, 50G, 85G, 130G, 210G, 350G, 470G, 870GHigh Priority Items
- Swing bearing grease and rotation smoothness
- Track tension—1-2 inch sag at midpoint
- Boom and arm cylinder rod condition
- Bucket teeth and adapter wear
- Final drive oil level both sides
Common Defects Found
- Hydraulic hose wear at boom pivot
- Track shoe bolt looseness
- Swing motor leaks
- Cracked bucket welds
- Worn pins at stick-to-bucket joint
Wheel Loader Inspection Focus
304L, 324L, 444L, 544L, 624L, 724L, 824L, 944LHigh Priority Items
- Articulation joint pins and bearings
- Tire pressure and wear pattern
- Transmission fluid level and condition
- Loader arm pivot points
- Steering cylinder rod condition
Common Defects Found
- Tire sidewall damage from debris
- Articulation joint play
- Leaking steering cylinders
- Worn bucket cutting edge
- Transmission overheating
Dozer Inspection Focus
450K, 550K, 650K, 700K, 750K, 850KHigh Priority Items
- Track tension—proper sag per manual
- Sprocket wear and alignment
- Blade cutting edge and end bits
- Blade lift cylinder condition
- Final drive seals and oil level
Common Defects Found
- Over-tensioned tracks accelerating wear
- Rock damage to track shoes
- Blade tilt cylinder leaks
- Worn ripper shanks and tips
- Debris packed in sprockets
Backhoe Loader Inspection Focus
310L, 310SL, 410L, 710LHigh Priority Items
- Stabilizer pads and cylinder condition
- Swing tower pivot bearing
- 4WD front axle (if equipped)
- Extendahoe cylinder (if equipped)
- All four tire pressures
Common Defects Found
- Stabilizer cylinder seal leaks
- Worn swing tower bushings
- Front axle CV joint wear
- Loader bucket cutting edge
- Brake pedal linkage wear
CTL / Skid Steer Inspection Focus
312G, 314G, 316G, 317G, 325G, 331G, 333GHigh Priority Items
- Rubber track condition and tension
- Track guide wear
- Quick-attach coupler locks
- Auxiliary hydraulic flow
- Cooling system screens
Common Defects Found
- Rubber track edge cracking
- Clogged cooling screens
- Worn drive sprockets
- Hydraulic case drain leaks
- Cab air filter clogging
Replace paper checklists with mobile forms that guide operators through equipment-specific inspections with required photos.
Inspection Process Guidelines
Following a consistent process ensures thorough inspections and builds the habits that catch problems early. Here's the recommended workflow for daily equipment inspections.
Approach & Initial Assessment
1-2 minBefore touching the machine, observe from a distance. Look for obvious damage, leaks pooled under the machine, or anything out of place. Check for lockout/tagout tags and review the previous operator's notes.
Walk-Around Inspection
5-7 minCircle the machine systematically—always in the same direction. Check fluids, inspect undercarriage, examine hydraulic hoses, verify tire/track condition, and document any concerns with photos.
Cab Entry & Controls Check
2-3 minUse three points of contact to enter. Check that controls are in neutral before starting. Verify gauges, warning lights, seatbelt, mirrors, and that the cab is clean and free of obstructions.
Startup & Function Test
2-3 minStart the engine and watch for proper warning light sequence. Check oil pressure, listen for unusual sounds, test all controls for smooth response, verify brakes, and test safety systems.
Document & Report
1-2 minRecord hour meter reading, document any defects found, attach photos of concerns, and submit the inspection. Report critical defects immediately to supervisor and tag equipment out of service if needed.
Defect Classification & Response
Not all defects are equal. A clear classification system helps operators know when they can continue working and when they need to stop immediately.
Safety-critical defects that create immediate risk of injury, death, or catastrophic equipment failure.
- ROPS damage or modification
- Brake system failure
- Steering system failure
- Structural cracks in boom/frame
- Major hydraulic leak (fire risk)
- Low/no engine oil pressure
Significant defects that could worsen quickly or affect operation, but don't create immediate safety risk.
- Minor hydraulic leaks
- Backup alarm malfunction
- Warning light issues
- Worn but functional brakes
- Track tension out of spec
- Damaged mirrors or cameras
Non-urgent defects that should be addressed during next scheduled maintenance.
- Low washer fluid
- Minor cosmetic damage
- Worn but serviceable components
- Dirty cab or controls
- Small chips in glass (not cracked)
- Missing non-safety decals
Documentation Best Practices
Good documentation protects your business, supports warranty claims, and provides data for fleet optimization. Follow these practices to maximize the value of your inspection records.
Capture Photos
A picture is worth a thousand words—and protects against disputed claims. Photograph defects, wear patterns, and hour meter readings.
- Take photos of all defects found
- Capture hour meter at each inspection
- Document repairs with before/after
- Use consistent angles for comparison
Be Specific
Vague notes don't help mechanics or protect against liability. Describe exactly what you observed, where, and how severe.
- "Left track cylinder leaking at rod seal" not "hydraulic leak"
- Include location, size, severity
- Note if condition is new or worsening
- Reference previous inspections
Record Hours
Hour meter readings tie inspection history to equipment lifecycle and trigger service intervals. Make it a required field.
- Log hours at every inspection
- Track hours between services
- Calculate utilization rates
- Forecast upcoming maintenance
Track Trends
Individual inspections show snapshots. Trends over time reveal patterns that predict failures and optimize maintenance.
- Review inspection history monthly
- Identify recurring defects
- Compare across similar equipment
- Use data to adjust PM intervals
Frequently Asked Questions
Standardize Your Fleet Inspections
Replace inconsistent paper processes with digital checklists that ensure every operator follows the same thorough inspection routine. Get complete visibility into equipment condition across your entire John Deere fleet.